Plasti dip is a removable rubber coating that you can apply to almost any item and even to vehicles. The term “dipping” means to wrap a thing with plasti dip or to cover with rubber coating. I began dipping my 2013 ninja 650 last Saturday, August 22, and surprisingly the job ended on Monday. I still can't believe what I estimated to be a one-day dip job took me three days to finish. My tip before you disassemble any fairings on the motorcycle is to make sure you study it well. Observe how things are first before taking out anything. Put the screws and label them accurately so that you won’t get confused later. Indeed, you might say that’s too much but believe me when it’s time to put it back you’ll be thankful you listened to this advice. Having a manual for the motorcycle also works well as you can see where the bolts and pieces go. Always watch the edges of all parts you dip! If the dip you applied is too thin, you might accidentally peel it off when you’re putting the parts back. Some factors that affected my work:
1.) I dipped the motorcycle outdoors.
2.) Taking off the parts of the bike took more time than expected.
3.) High winds and over spray was a problem.
4.) I couldn't decide on the color.
Saturday, the weather was doing great for dipping after a week-long of rain, the sun finally set to shine. Took off all the fairings from the motorcycle and decided to clean them up with pre-dip spray. I then setup the HVLP spray gun to spray black plasti dip. I went to try out the spray gun, and it died after ten minutes! I quickly unplugged, and it smelled like something burning. Holy! I think I fried the circuits on this thing! I wonder if my 100$ investment from Amazon was now just junk. I look at it for a while still trying to figure out what cause it and as soon as I flipped the thing over I saw the label, and it said 120 volts! I should have known the thing would be 120 volts! In fact, any USA product would run at 110 volts and not the 220-volt outlet we have here in the Philippines.
By this time, I am praying that the designed is advanced enough to have some circuit breaker protection and maybe that said the quality would save it from my user error. Not that I don't have any step-down transformers that convert 220v to 110v in hand. I just totally forgot to check the voltage and that label under the blower wasn't helping either. The excitement now turned into despair. I said to myself “well let's just give it an hour and maybe it will revive itself like Jesus on the 3rd day. Hopefully, a miracle at a time would be good”. So I set the thing down still depressed over the stupid error I just made. After an hour, I went back with fingers cross and all the saintly prayers I could come up. I put the sprayer back in the transformer this time and tried to put it on. Nothing! “The thing is now kaput! But then maybe it just needs another hour?” But I'm not too optimistic after all it still smelled burned!
I tried to open the HVLP spray gun, but the screws are of a particular kind. It seems I won't be able to service the thing. I suspected that maybe a fuse from the power regulator got burned down. I refuse give up! By this time, it's already 3:30 pm. With little hope left, I plug it into the transformer one more time. The thing started vibrating. Alas! It worked! Miracles do happen or perhaps the protection circuits did its job. I began to inspect it, still worried that the thing might have lost something due to that over voltage but nada! I couldn't find anything wrong with it.
Now it's time to dip! The excitement was back again knowing whatever God's there was that day gave me a 2nd chance to dip the motorcycle. I started to mix the black plasti dip with my electric drill. The drill bit I replaced with a paint stirrer. Gave it at least 5 minutes in full power to mix. The sprayer gun is now with black plasti dip; then I tried setting the pattern into a vertical fan. The tricky part was the pressure dial! The HVLP sprayer gun seems to be too powerful to apply the dip correctly. After an hour of trying out all possible settings on the thing, I finally was satisfied with one and I use my red marker to mark the settings in case someone tries to mess with it. I dipped my front fenders first and then the whole fairing. There wasn't enough time to finish everything as I gave it a 15-minute break after spraying another layer of it.
 |
| Mark your settings on the HVLP gun |
 |
| Dipped the indicator |
 |
| Don't worry about the headlights! Plasti dip is removable. |
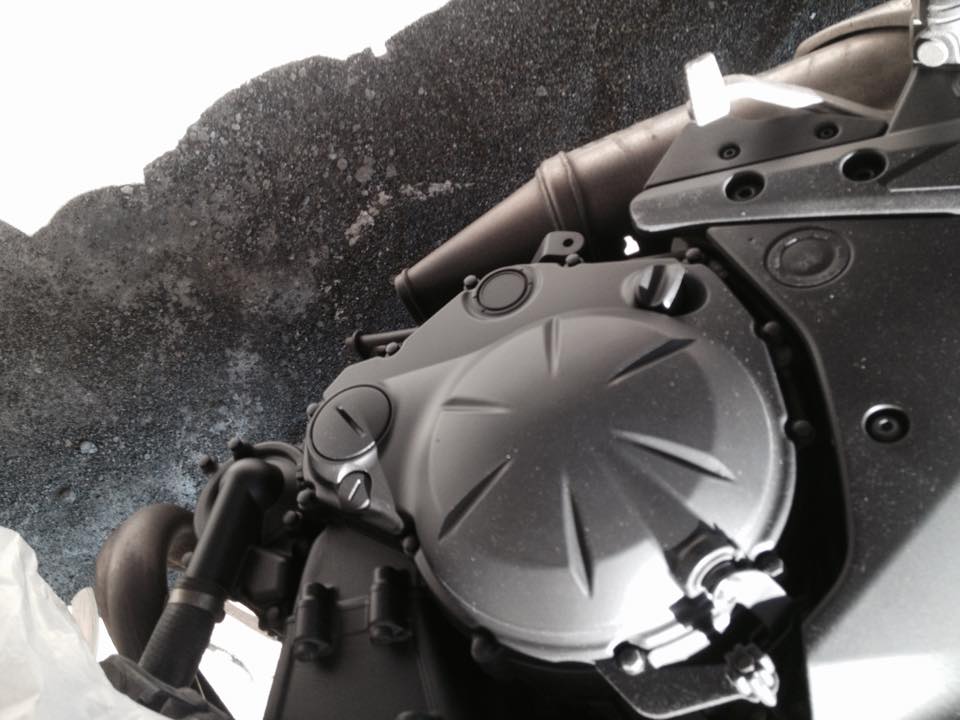 |
| Yes, you can use plasti dip on the engine cover. It is heat resistant up to 400f |
 |
| Custom Windshield design |
 |
| Make sure to dip underneath the tank as well |
 |
| Watch out for the edges |
 |
| Smoke brake lights with black plasti dip |
I remember the how-to videos on Youtube, how they sure make things look so easy, but the reality is far from the experience. The fairings kept swinging around, and I have to use my hands sometimes to maintain the pieces in place and at the same time very careful not to hit the wet paint. I wore some latex gloves that didn't last probably because of the thinner. The worst part was it was windy, and I sprayed some dip, and it flew back to my face! Luckily I was wearing a respirator but I think a few of the dip landed on my hair and eyelids. It was now dark, so I had to call it a day and start with the pearls tomorrow.
 |
| Speed Shape with Cotton Candy Color Shift |
Day two woke up early and very excited to dip. I opened my Cotton Candy, and Atlantic color flip pearls, but now I can’t decide what to use! I ended up testing them in a speed shape. Atlantic mostly was green and had ghost effect of dark blues and the cotton candy was metallic blue and had a ghost effect of pinks popping out. I still could not decide so I created a 50-50 mix of them just to see what happens and sprayed it over the black speed shape. The combination was excellent; it was a bit purple with a slight fade of magenta. As I returned from my color mixing quest, I notice the fairings has a lot of dust and lint on it! I stored them indoors, but there were a lot of particles on the surface. I went to grab the pre-dip spray and prep all the things again.
 |
| From left the Atlantic, followed by 50-50 mix of both Atlantic and Cotton candy, last is Cotton Candy |
After lunch, I was contented with the cleaning job I did for the parts. Mix the matte clear with glossifier to make satin, a 50-50 mix this time then mix one bag of the pearls 25 grams each into the can. I notice something as I went to prep the fairings, the edges had a little dip in them and started peeling! So I went out to set the gun with black plasti dip and do a retouch of every edge and corners before finally using the pearl. I always spray it first on the speed shape to determine what would be the color in the 3rd or fourth layer. Why I do this is because cotton candy is a white kind of pearl and too much will white it out! After five coats, I could sense that the speed shape was now whited out, so I had to stop at maybe 3 or 4. By this time, I was fully aware that the edges need to be entirely cover in plasti dip. Fairings with unusual curves and shapes tend to be the most difficult ones to dip. They can be a little bit hard to get into and when you don’t have patience and just spray it all out, it will start dripping. I learned this the hard way after the left side fairing had a few drips. I had to peel it and do it over again from black to the pearl mix. Thankfully it was very easy to peel the plasti dip off.
The parts now were dipped with 50-50 mix of Cotton candy and Atlantic. I still have some left over glossifier around half a gallon, and so I decided to try it out if it is as glossy as they say. I set up the spray gun and went to work the glossifier on the fender and bam! The thing was so bright in the 1st work than the matte finish it had before. The instructions said it will shine more with more coats, I just gave the fender one coat of gloss and the rest I put two coats, half a gallon was enough for it. I have to say that if you’re dipping something with a color changing pearl then you need to apply three coats of gloss! Otherwise, I think it would be a waste because the color flips pop out more with the glossifier. Be careful with glossifier as it is thinner than the plasti dip
 |
| When they are this close, you need to watch out for overspray or better give them enough space while you spray them |
 |
| When making custom designs like this on the windshield, make sure to peel it when wet on the last coat of plasti dip |
Day 3 and the dipped parts was now dry and ready to be assembled back into the bike. I put the fairings back on and tried my very best to remember which is which and man it was hard! I spent an hour attempting to figure out why the right side fairing was difficult to fit. The right side had the coolant reservoir, and it was a pain to put it back. I was supposed to sandwich the fairing and let some parts of it show. A motorcycle manual by your side helps you a lot in this case.
 |
| View from above |
 |
| The final result |
Overall materials used up was:
1 gallon of black plasti dip
1 gallon of matte clear
1 gallon of glossifier
25g pack of Atlantic color shift pearls
25g pack of Cotton candy color shift pearls
I still have half a gallon of the 50-50 mix left over. If I haven’t redone some parts then perhaps ½ gallon of black and matte clear plasti dip would probably be enough. 1 gallon of gloss or if you can afford it buy another one gallon. I am satisfied with the results but I kind of wish it's glossier looking. Working with the plasti dip was fun and easy but putting back the fairings was not fun at all. I can’t wait to try on other colors for maybe next year.